

The Wallbox2 MP3 kit recreates the original operating conditions of your Wallbox SEEBURG 3W1 wall-o-matic. The space available inside a 3W1 is limited so we decided to do this tutorial dedicated to the most beautiful wallbox ever.
In less than 2 hours you will have achieved the installation of the kit and you’ll be able to enjoy long years of music you have loaded in a single SD card.
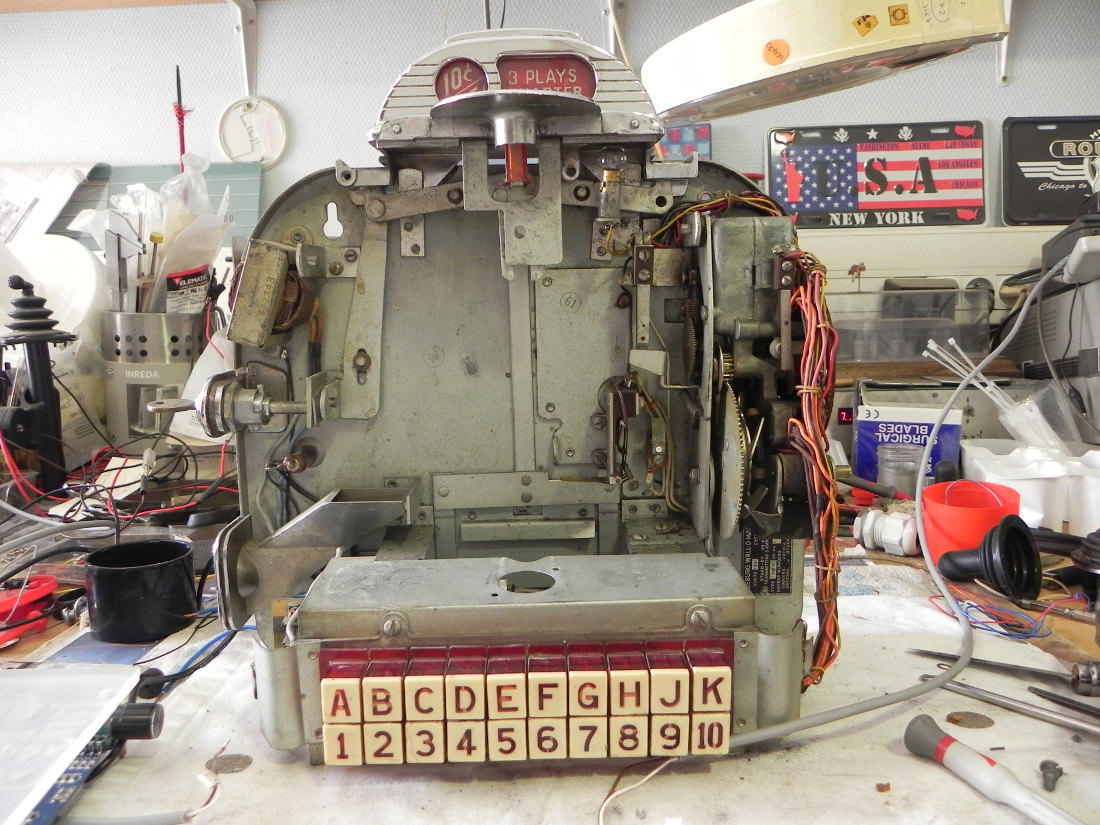
The choice of the title will be released as originally while typing its letter and number
The description below allows you to mount it inside the wallbox.
But it can only be done if you remove the coin selector and the coin receptacle to free enough space required for installation.This means that you’ll have to configure your 3W1 for free credits
And so your 3W1 become a truly independent jukebox without external card.
As always, you will find in your kit:
-
Electronic card wallbox2mp3
-
PSU 5volts US model (you’ll need a US plug even if you’re in the European countries,you’ll understand why below)
-
Spacers ,cover and mounting items.
And you’ll also need :
-
Power cord with plug (depending on your country)
-
Fuse holder and fuse 1-2 amps.
-
AC transformer 24volts 30-50 VA.
-
Small length of flexible wire of small section (0.34 mm to 0.5 °)
And To perform the assembly exactly as we did, you will need:
-
2 female terminals FAST-ON.
-
3 fork terminals for M3.5 screws
-
Forest diameter 2.5 mm. / 6.5mm.
-
Tap M3 mm.
-
Heat shrink tubing of different diameters
- nail polish for marking
The necessary equipment is very common :
-
Screwdriver
-
cutting pliers
-
Crimping tool for terminals.
-
Drill press or portable
-
10mm closed-end wrench.
Before performing the installation, you should ensure that the wallbox is perfectly
operational.
The various contacts of the encoder wheel should be cleaned. (See maintenance tutorial)
We recommend a complete disassembly and cleaning of the 3W1 before operating.
Former potential wiring must be removed from the wallbox.
The prepared wallbox is as follows:
-
-
seeburg 3w1 opened Open and drop on your worktop the content of the wallbox2mp3’s mounting bag.
Mount the 4 spacers and screws on the PCB.
Put a some nail polish on the tip of the threaded rods to mark the location of the holes.
 Apply the electronic board in the front-bottom of the wallbox to mark the future drilling points, then remove the PCB.Your marking is done:

Drill into the bottom of the 3W1 the 4 red locations using a drill,
Then tap ( diameter M3 ).
Screw the 4 spacers in your Seeburg.

Mount the card with the supplied screws, lock moderately.

Turn the wallbox and mark drilling for the transformer holder (screw diameter 6mm / 0,24″)
place the transformer at about 1 cm from the bottom.

Drill with a 6.5mm /0,25″ diameter forest.
Put the screws supplied with the transformer from outside to inwards, place a silicone washer, then the transformer and the second washer silicone, the metal cup, and finally the nut.
Tighten very slightly with a 10mm / 0,4″ wrench, taking care to center the transformer on its axis.
The transformer is now installed in the 3W1:

Bring both 24VAC output transformer wire to the terminal block of the wallbox at the bottom left.Connect one of the two son on the ground terminal (frame), connect the second wire of the transformer with an extra wire to the terminal 24vac. (Thread for example). Connect another piece of wire to the signal terminal (white wire for example)

bring these two wires to the wallbox2mp3
Connect them on the terminals marked “wallbox 24VAC / signal”

The transformer of our example comes from RADIOSPARES reference 257-4963
The output is a 12 volt twice that we connected in serial to generate 24 volts.
We inserted the fuse holder and the fuse between the two secondary windings.
If your transformer has a single output 24 VAC, insert the serial fuse holder on one of the two wires.
Here are our assembly:

We now have to connect theprimary of the transformer 24 volts,and to plug the 5 V to power the wallbox2mp3.
For this we use a tip to use only one power plug to connect to the mains.
To do this, specify when ordering that you need a power supply with US plug.
Cut with a saw, or a big clamp the two prongs of the plug two millimeters below the hole. (see marking on the spindle not cut)


Crimp carefully wires on females FAST-ON terminals that have to be insulated models.
Spread a little inside the terminals with a screwdriver blade to facilitate insertion of the pins of the plug.
Check carefully that no metal is visible, (the terminals must always cover the pins)
Pull a little on the wires to check that the crimping is good and safety.
Note: This mounting can be dangerous because you works with AC 220V or 110V depending on your actual country. Fire or death by electrocution risks exist when working on such a current.
We can not be held responsible in case of damage or faulty installation.
In case you’re able to this installation, this must be done with great care.The insulation must be perfect, the gauge of the wire must be big enough.you should never work when the system is powered.finally, you should do (and maybe change) the assembly according to the electrical standards in your country.
Once said, we can continue working on your wallbox 3W1 Seeburg.
Gather the power of 24VAC transformer’s input with the wires from pods connected to the 5 volt supply, switch the power cord and outlet through the hole at the bottom left of the wallbox.
Gather the two groups of 3 and screw the son on an isolated terminal

We have decided to weld the wires, and insulate them with heat shrink.

Secure the assembly with a second larger and longer sheath
covering the whole connection. Pinch the tip before it cools.

You can now plug the 5 volts power supply to the wallbox2mp3
Take this opportunity to store electrical wires, and attach them with small collars
Type LEGRAND COLRING ref: 32030 (RS 620-2549)
Finally, grab an SD card. V isit to our website by following this link:
https://www.wallbox2mp3.com/en/software/
You will be able to automatically generate tags (title strips) for your selections.
You can now turn on your 3W1, and enjoy your work for many years.
This tutorial was made with great care.
We hope it has given you ideas to complete your achievement.
However, we may have committed errors or omissions.
In this case please report them, we will rectify them.
In any case, we can not be held responsible for any damage to persons or equipment if we do not directly operate on the equipment.
It is your responsibility to assess your skill level, and to achieve the mounting by a professional if in doubt.
Wallbox3mp3’s team wishes you to enjoy your wallbox well equipped for years.
If you have an idea to contribute to our tutorials,please contact us, your photo reports and videos will be published on our website.
The wallbox2mp3 team thanks you for your interest.