
- This topic has 3 replies, 2 voices, and was last updated 3 years, 11 months ago by
hbajwa20.
-
AuthorPosts
-
-
12 June 2020 at 23 h 56 min #47478
hbajwa20
ParticipantHi guys,
We’ve been setting up our new 3W1 with the Wallbox2MP3, but we’ve hit a slight bump in the road with free play.
We have removed the reset bracket but upon turning everything on, we were only able to play songs when activating the coin switches (just by pushing them down, to simulate a coin hitting them). We only achieved a maximum of two songs from activating the end switch.
Obviously, without the reset bracket, we expected free play to be activated from the get go.
So what are we missing? Please bear in mind that we are fairly inexperienced in terms of electronics etc.
I saw someone suggest that we need to manually activate one or several of the credit unit contacts. I will be trying this now, and will post back if it works. However, I don’t think I know how to do it just yet, so any tips on this would be appreciated.
Thanks,
Hassan
-
This topic was modified 3 years, 10 months ago by
Klaatu.
-
This topic was modified 3 years, 10 months ago by
-
13 June 2020 at 0 h 34 min #47479Participant
Well, we managed to sort it out! We realised that in fact the reset bracket was not missing from the appliance as we first thought, but that it had been moved to an out of the way position right up against the side wall. So, if you’re reading this in hope of help, check it again!
I’m not sure how much it helped us but, having removed the reset bracket, I manually activated all 6 snap-action switches by rotating the credit assembly (by turning a gear just by the coin switches) and then clicking the snap-action switches down (technically towards the back of the Wallbox if it’s upright). They will now stay up for ever more!
If you are looking for a more in depth explanation into configuring a 3W1 for freeplay, just reply to the discussion and I’ll be happy to help.
-
15 June 2020 at 18 h 25 min #47486
Klaatu
KeymasterYes please, explain how you did it, could be of help to others in the future 😉
-
12 August 2020 at 18 h 26 min #47487Participant
Sure, so here’s a step-by-step guide for anyone who wishes to convert a Seeburg 3W1 into free-play. This may apply to other models, but no guarantees! 😉
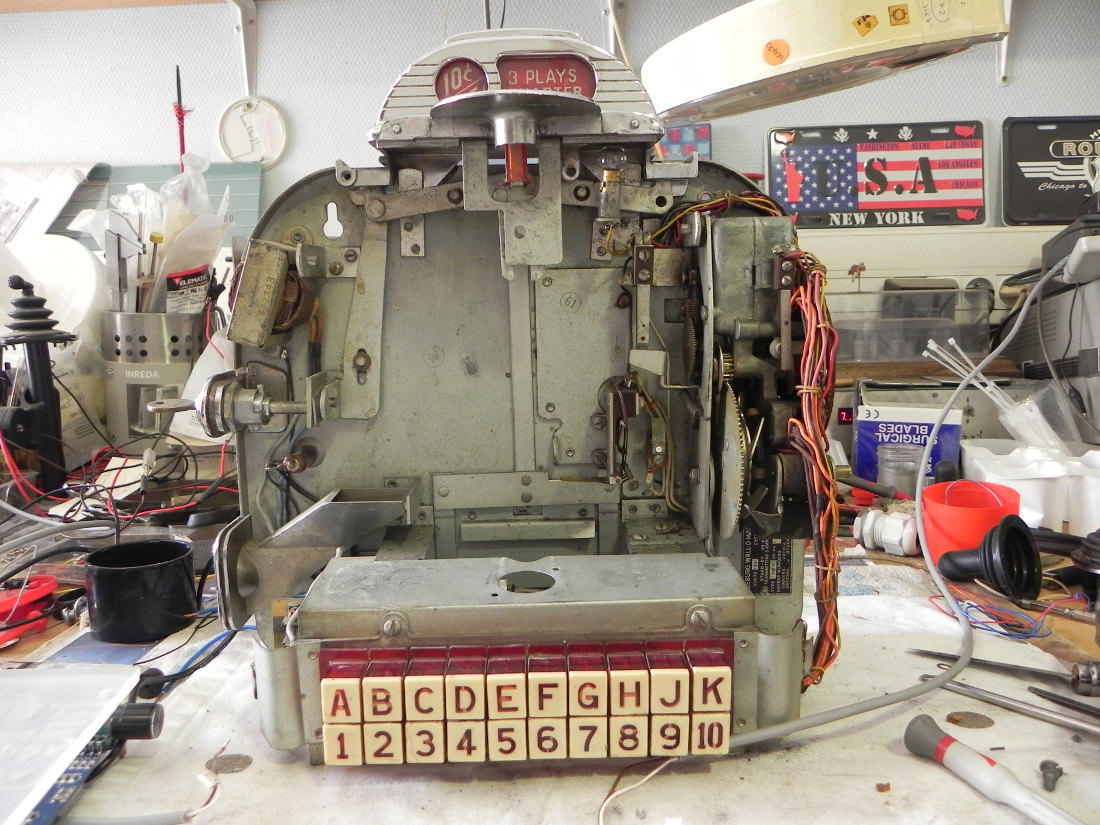
1. Open your Wallbox so it looks like this.
2. Turn it onto its left side so that the side of your Wallbox with the selection plate (the big brown circle) is on top.
3. You should now see a sort of wide U shape metal piece just below the selection plate – this is called the credit assembly. You can find more information about the credit assembly (and indeed the whole 3W1) by visiting this link, which is the original repair and operation manual. Incidentally, I recommend reading through this manual to give you a better idea of how your Wallbox works before you go repairing anything.
4. There are two small bolts towards the top of the credit assembly – these hold the top plate on. As we want to get into the workings of the credit assembly, remove them and put them in a safe place. You can now remove the top plate, and you can now see into the innards of your assembly.
5. Using the manual as a guide, identify your reset bracket. In case you didn’t realise, the “snap-action” switches (horizontal being off, and diagonal being on) are deactivated (pushed upwards) when they rotate past the reset bracket. I can explain how this works in more detail if you want, but it’s not strictly necessary for this operation.
NOTE: If you can’t see the reset bracket in the position you would expect, it is more than likely there – it’s just in another position. Look again, to either end of the credit assembly – mine was actually screwed on snugly against the side of the Wallbox.
6. Now, once you know where your reset bracket is – remove it by unscrewing it. The screw on mine was particularly stiff so we used some WD40 to loosen it (we left it overnight).
7. Once the reset bracket is off, you have two options – you can either discard it, or you can replace it, but upside down – this won’t affect the operation if done correctly. All you have to do is refit the bracket exactly as it was before, but instead of having the L point downwards, point it up, towards the top plate of the credit assembly. It should now be on the same level as the solenoids (see the manual), not below them as it was before.
The only benefit to the replacement method is the ability to reconvert it to to pay-per-play in the future, but if you’re discarding your coin operation system to fit the Wallbox2MP3, there isn’t a high likelihood of that happening – in any case, reset brackets are available to purchase on the internet.
8. Once you have replaced or removed your reset bracket, you can refit your top plate and you’re almost ready for setting up your Wallbox for free-play.
9. There is a gear that you can turn to rotate your selection plate and switch assembly – this isn’t noted on any diagrams that I know of, but you can identify it on page 5 of the manual – it’s the cog directly to the top left of the cam. It’s quite prominent on the wallbox in real life, so you shouldn’t have any issues locating it. When you turn the gear, you will see the wiper move – the natural movement is clockwise so stick to turning the gear so that the wiper exhibits clockwise motion, otherwise you might risk all kinds of nasty things.
10. Once you are acquainted with this pleasant little gear, look towards your switch assembly. With the assistance of the diagram on page 6 of the manual, identify your snap-action switches. Now, flick any you can see into the “down” position – this basically means gently pushing them away from the top plate of the credit assembly – if they aren’t co-operating, you’re going the wrong way. They should now be diagonal, as shown somewhat unclearly by the manual diagram. Now, turn the gear mentioned in part 9 and as each remaining switch appears, turn it “on”.
That’s it! When you get your wallbox powered up, you’re going to have it all ready for freeplay.
There is an alternative method to steps 9 and 10, which involves a powered and open wallbox – you flick the coin switches and this activates the solenoids, which in turn makes the snap action switches “on”. I personally prefer the first method, as I have doubts as to how well this one works in the long term. In any case, I’m not an electrician, so it might be even better – I really don’t know.
Any questions, just ask.
-
-
AuthorPosts
- You must be logged in to reply to this topic.