
Forum Replies Created
-
AuthorPosts
-
Scudie
ParticipantWow Bobwiley
It’s certainly been a while, I have just had to sit and read the thread as I could not remember exactly what your problems were !
l guess I had assumed that you had got it all sorted by now, will try to help if I can.
As I said in one of the earlier posts I had a very similar problem with a SC1 that was missing it’s APU 10 -56 credit unit. I found that part of the the number selection circuit was on the credit unit, so I only had 20 selections instead of the 160.
If you haven’t built a test rig, you could check the pulse being sent for the selections with a multi meter if it has a ohms function, if it has a continuity function with an audible warning even better!
Connect one lead to the chassis and the other to the signal terminal then select say A 5 then advance the wiper arm manually around the contact disc you should get a beep as the wiper touches some of the number contacts on the SC that I have on the desk there is no beep for the first four but there is a beep on all the others.
Cheers Scudie
ParticipantHi Randy
I did print a set off on the standard white label paper but thought they looked a bit stark too clinical . So printed a set with a pale yellow background in my opinion it looks better.
On the first SC’ I did the page unit was ok not perfect but useable, on all the subsequent ones the pages have been stuck together so have been cleaning all the labels and glue residu off and replacing them with the sticky label version that I used on the above photo.
Cheers Scudie
ParticipantHi folks
Have found a bit of time to make some progress with the SC1, the page unit now has new title strip selection letter/ numbers printed onto sticky backed label paper, the black instruction strips I scanned the originals again and after a little messing about managed to copy and paste another 10 onto the sheet after yet more messing I managed to resize them so when printed onto glossy photo paper they actually came out a very similar size to the originals.
Still got to sort out some 5mm glass for the front cover, as I have been distracted recently with decorating etc.
Randy thanks for the emails, I think I have suitably resized the the Seeburg Consolette script, when I have the new glass I will print it onto some clear sticky vinyl that I have.
Sooner if you have the advert versions of the black strips that you posted, in a format that prints out the correct size I wouldn’t mind a copy if you don’t mind.
Cheers Scudie
 Participant
Hi Chaps
Thanks to you both for your suggestions / advice.
I did try copying the black instruction strips but when printed they came out bigger than the originals, not sure why ? any files that you have that you think might help with recreating them would be great & thanks.
Randy after you printed on Printable Transparent Sticker Paper did you then stick this to something else?
Cheers Scudie
ParticipantWill chalk that one down to experience, will try to pop into glass merchants tomorrow and get a new piece.
Started on the page unit all the pages were as per well stuck together, have removed all the old sticky labels & glue residue will print some new ones later.
Got to find some replacement Turn Page black plastic labels or the pricing ones as there’s half of them missing. I Seem to remember some one printing some on photo paper?
Cheers Scudie
ParticipantOk so I have had a go at the scratched glass as I said the damage was quite deep and could be felt. After finding a piece of dense polystyrene to place the glass on I started with a piece of 400 grit wet and dry paper on an electric sander and a small amount of water on the glass after ten minutes of sanding it had made very little difference if any! to the glass, so swapped to 320 grit paper ten more minutes sanding again made no visible difference, so swapped the paper for a diamond sharpening stone that’s made for sharpening wood chisels.
This did the trick! although it probably took an hour or so of rubbing to reach the point that the damage had virtually disappeared however it also hi lighted the fact that there were other areas of damage. I carried on for another hour or so with the diamond sharpening stone again using a little water with it. I eventually called it a day and left the glass on the polystyrene for the night!
So the next day I went back to it with the intention of polishing up the glass with a kit that I bought, unfortunately it would appear that the decals that Seeburg used on the inside surface of the glass especially the SEEBURG CONSOLETTE lettering do not like being left overnight on a wet surface as when I lifted the glass to inspect my previous nights efforts half of the lettering was missing / displaced.
As the whole point of this was to re use the glass with its original lettering intact it now seems fairly pointless spending hours trying to polish the glass when for a few pounds I can buy a new piece & fairly easily mask off and replicate the black and gold lines at the base.
Cheers Scudie
-
This reply was modified 3 years, 5 months ago by
Scudie.
ParticipantI think I am ok with the credit unit & how it’s set up now, I have currently got it set up so a single press of the quarter coin switch is generally giving me 5 credits , I have moved the two grey wires from the # 8 position singles to #8 albums on the board, with a single quarter registered if any of the #8 selections are made nothing happens, if I press the switch so it has had two quarters registered then the #8s will play and the credit unit removes all credit for the single #8 selection.
I would really like to find a solution to the audio relay problem, will have to give it more thought, I may get arround to having a go at the scratched glass today!
ParticipantSo I had the idea to fit a switch that would make when released and to fit this to the end of the credit unit so as the contact quadrent returned to the no credit position it would activate the switch cutting the ground connection thus the relay would drop out, unfortunately it would do this as the last selection was made thus the last selection would not be heard.
As of yet I have not figured a way arround this problem which is disappointing, unless any one else can come up with a workable solution ?
Cheers Scudie
ParticipantOk so the audio control relay , the relay is grounded by WG contact of latch bar cam switch while the wiper arm is turning but once the wiper arm has come to rest the relay looses its ground connection and the relay drops out and the contacts open so the audio circuit is broken.
Part of the winding of the relay is connected to the terminal board marked VIO and is shown in the manual as Relay Audio control ground, if this connection is grounded the relay remains energised when the wiper arm has come to rest but the relay stays energised until either the AC or the ground cicuit is cut.
I am guessing that originally this relay probably would not be energised for more than half an hour or so (the length of time it would take to play ) one side of an album.
I assume that the terminal marked VIO would have originally been grounded by the phono probably part of the stepper unit.
ParticipantWell have got the credit unit working and the SC back together sufficiently to test it out, on previous SC’s I have manually closed the contacts of the audio control relay and fixed them with a small cable tie to stop them opening, on this one as I am trying to do things a little differently I am going to see if it’s possible to get the relay to operate electrically as it was designed to do.
Cheers Scudie
ParticipantHi Randy
Like that set up pal looks like that’s kept you busy for a while!
A pal of mine is talking of building himself a bar area he will be most impressed with what you have achieved.
My wife was very interested in the Menu on the door👍
Cheers Scudie
-
This reply was modified 3 years, 5 months ago by
ParticipantGot the email.
While trying to get the SC credit unit to work I have learnt a few bits about the
APU 10 -56 credit unit.
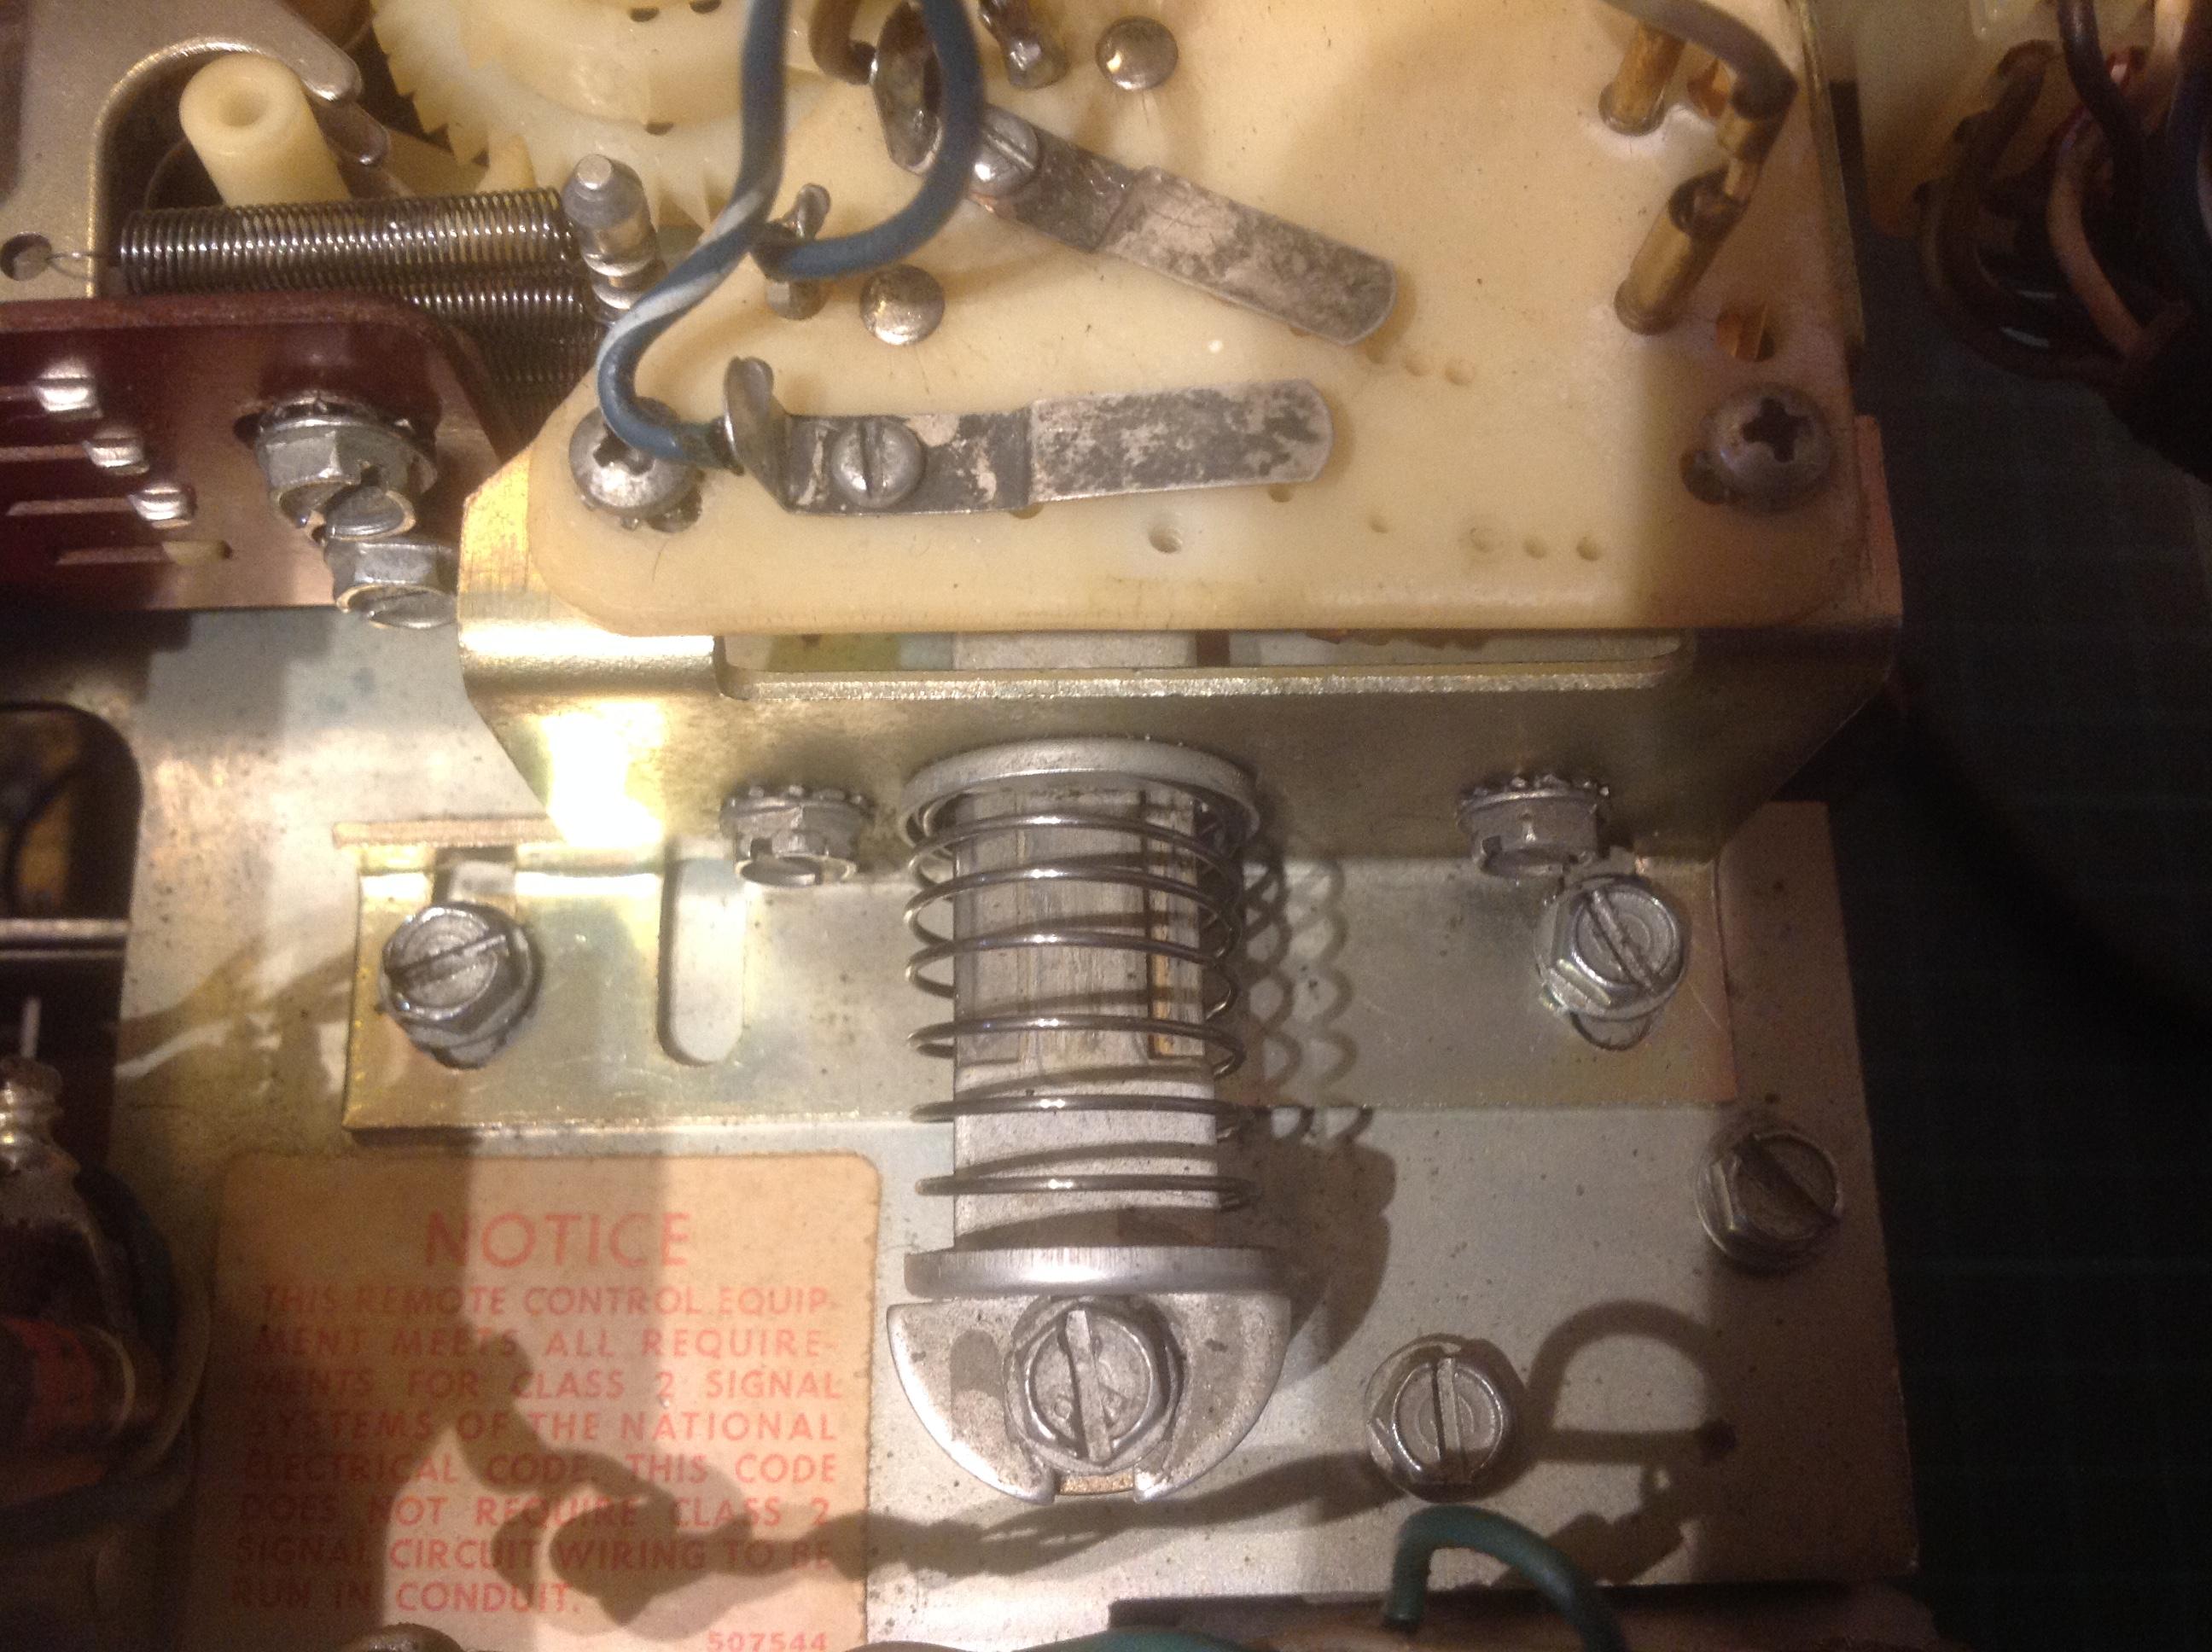
1 There is a spring that is connected to & wraps arround the lowest of the three credit wheels (nickel wheel) the other end of the Spring is secured to the chassis of the credit unit, it is the action of the credit removing mechanism that turns the credit wheels thereby tensioning the spring.
2 On the top triangular ish plastic cover that is held in place by two screws and a small e clip there are two Spring blades that hold metal pins in place, both the pins and the screws that secure the spring blades can be moved to several different holes, if the springs exert to much pressure on the heads of the pins it can cause the contact quadrent below to bind thus stopping the credit unit working, also depending on which hole the pins are situated they can have both an effect on the electrical circuit and in the case of the outer one it can act as a stop for the quadrant limiting how far the quadrent can move.
3 There are at least two different versions of the credit unit that is fitted to the SC it concerns the spacing of the two screws that secure the credit unit to the chassis of the SC it would appear that on the earlier machines the screws are closer together, closer by approximately half an inch than on the later machines, the later credit units can be fitted to an earlier machine but only one screw can be fitted if an early credit unit is fitted in a later SC.
See photo below.
Cheers Scudie
-
This reply was modified 3 years, 5 months ago by
ParticipantHi Randy
I guess your SC is working on coins ?
Did you run the AC for the coin switches through a 10 watt 40-50 ohm resistor as per instructions from Data Sync ?
I have eventually got the APU 10 56 working when I operate the quarter lever with my finger and from the quarter coin switch if I give it 25vac but if I connect the the coin switches through the resistor it doesn’t have the strength to lift the detent pawl.
Any suggestions?
Cheers ScudieParticipantHi Randy
Well they do look the business, I’m very impressed! As they say the devil is in the detail.
I put the SC back together yesterday afternoon , decide instead of going down the free play route, I would reinstall the credit unit and wire a momentary switch to the coin switches, mount the switch in the coin aperture with a coin glued to the switch Sooner did his like this a while ago, well I have spent hours with that blooming credit unit. I have eventually managed to get 3 credits with two presses of the switch but further presses achieve nothing. Will have to give it more thought.
Or just leave the damn thing out.
Cheers Scudie
ParticipantNice wallbox that!
If you take into account that the price you paid included next day delivery I guess that cost the vendor in excess of £60 I don’t think you paid over the odds for it, yes you could have waited and probably bought one for £300 to £350 but it may not have been as pretty as that looks.
Cheers Scudie
ParticipantWow that was quick, not sure what over the odds is for a 3wa but if it is in almost perfect condition I would think it’s worth paying that little bit more.
I have seen restored re chromed ones advertised in the states for around $1000 plus shipping a tax, & remember when items like this arrive in England you would probably have to pay an import tax & VAT on the total amount inc the shipping charge.
Chrome plating is very expensive and not guaranteed to turn out well, and I can guarantee you that when it doesn’t it’s very disappointing.
Can you see how the 3wa has been converted to free play ?
Enjoy it, any pictures?
Cheers Scudie
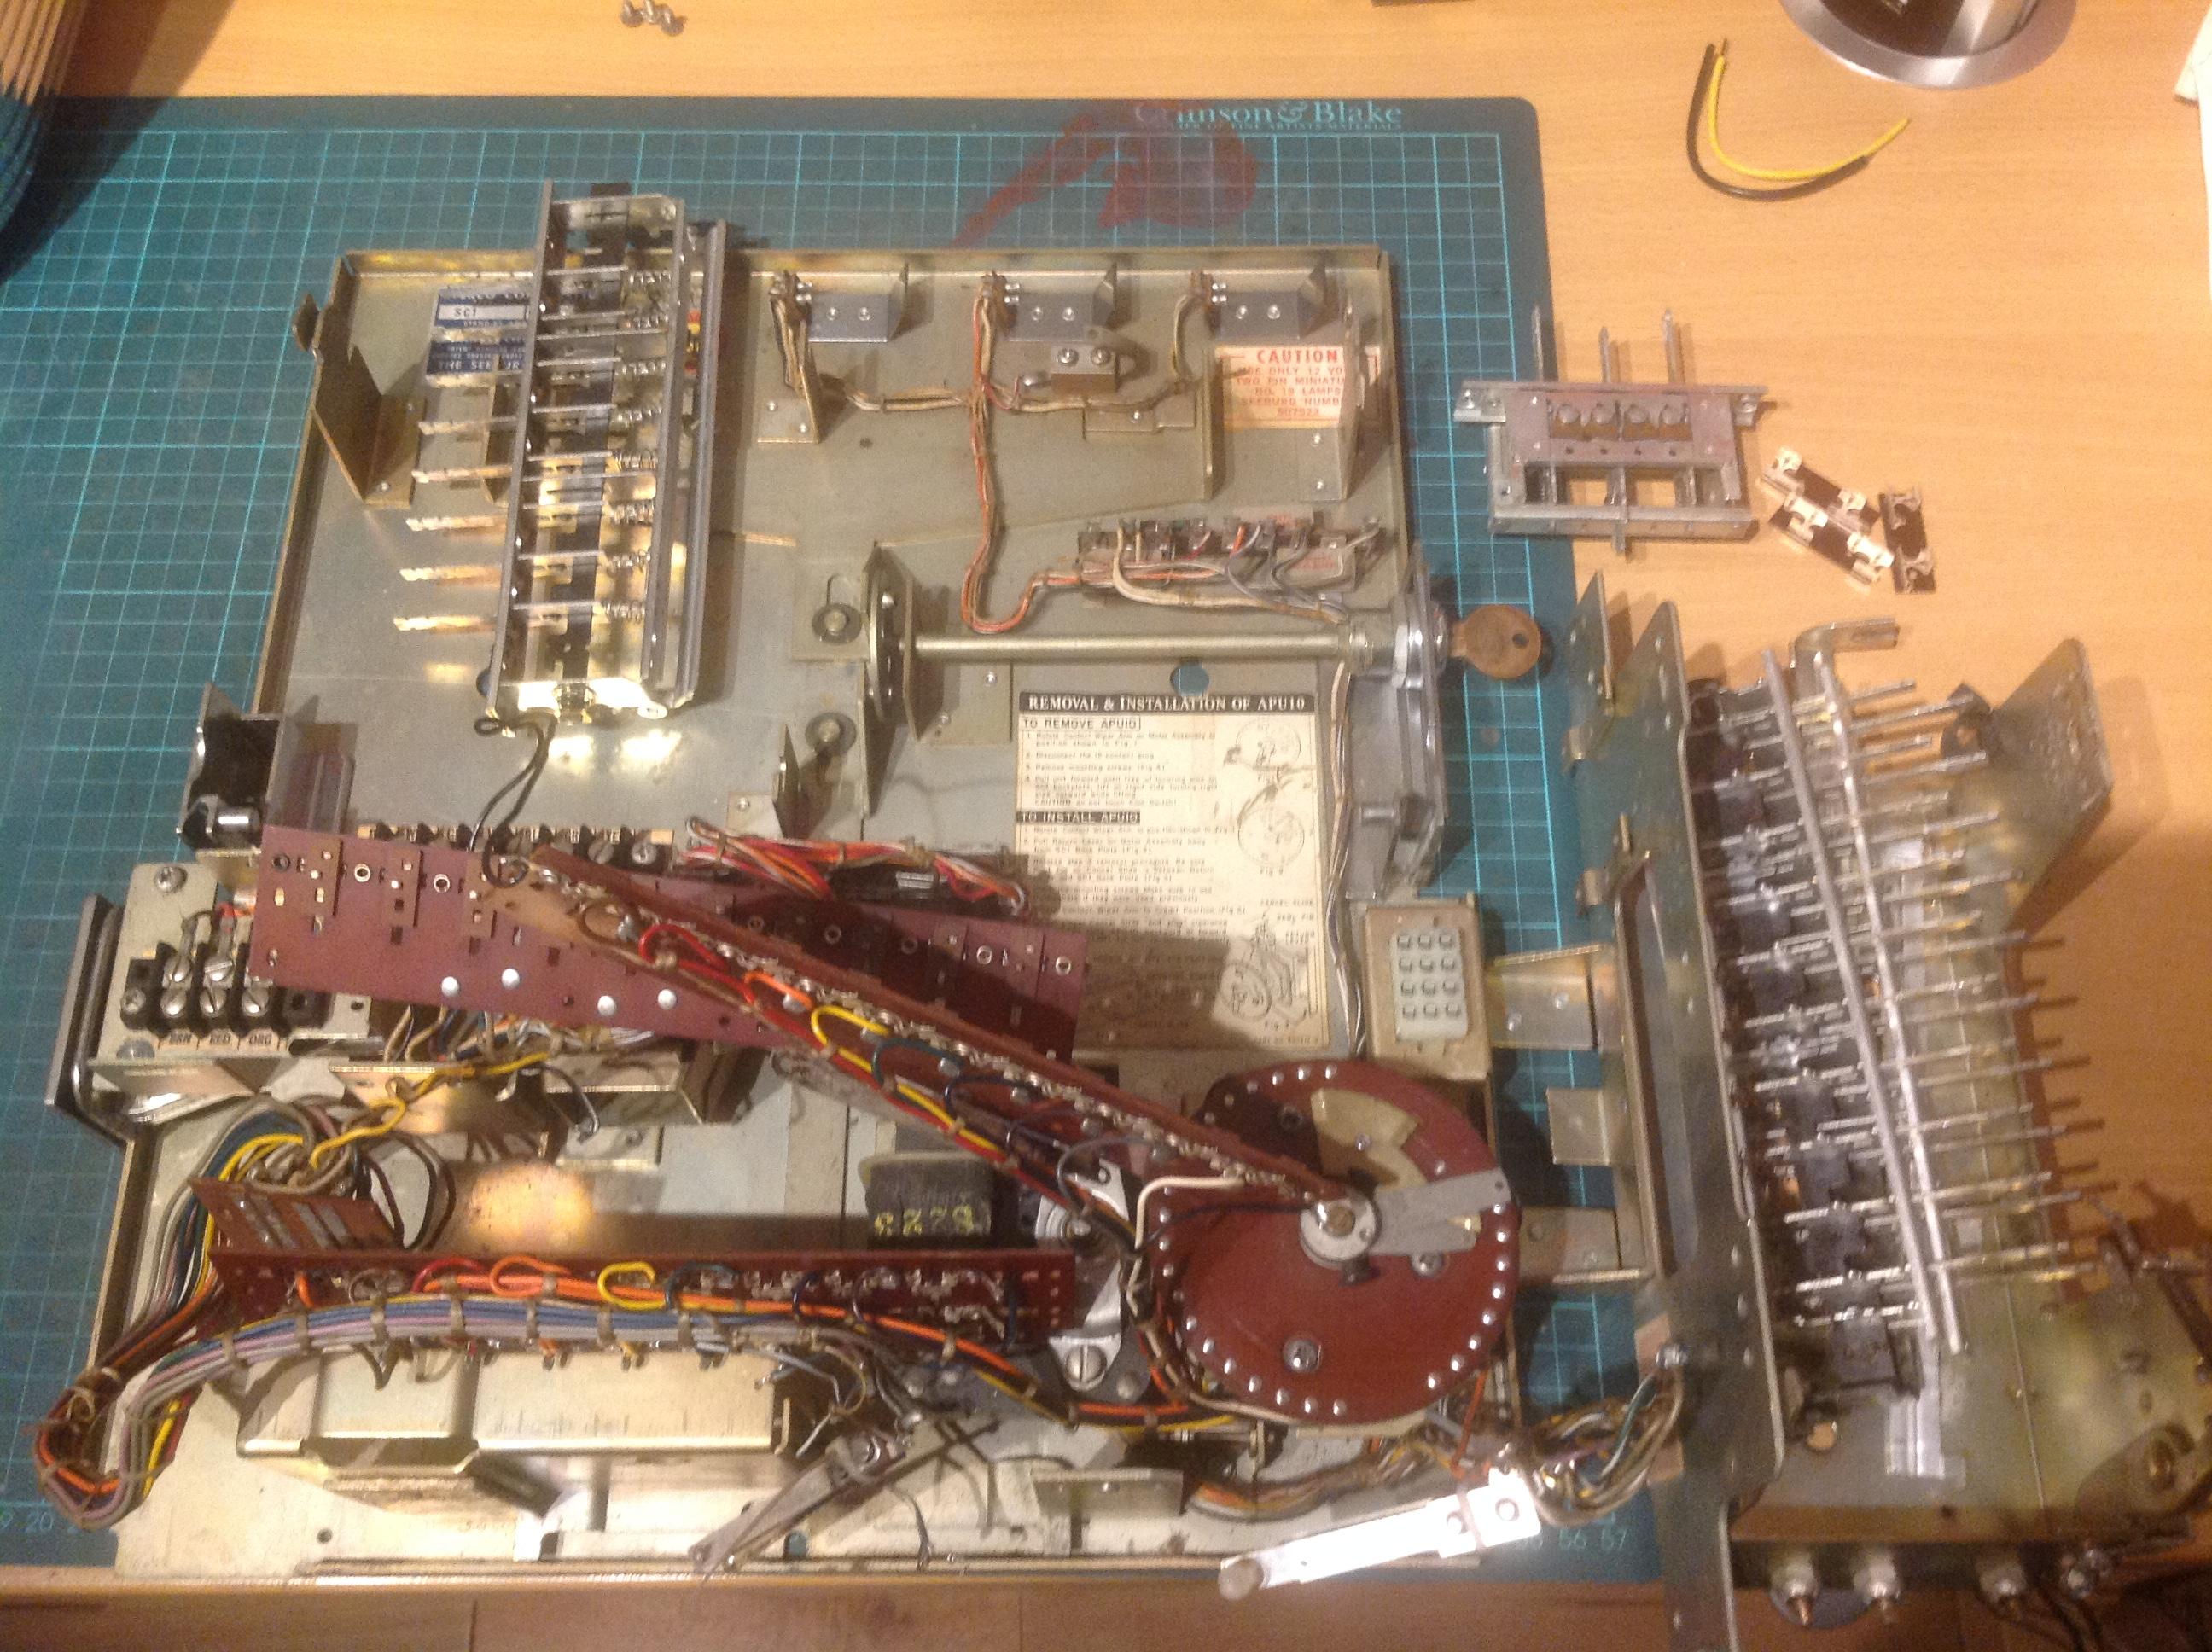
ParticipantInteresting video ! Had not seen that before, I use a detergent called Actiwash & spray it on using a basic hand trigger spray bottle then agitate the area with an old toothbrush, it would be great to have a large sink as in the video, I make do with an old cut down 25 litre plastic container sat on my foldable work bench.
Because I strip the box to the point shown in the photo I am able to clean specific areas without affecting any paper labels or soaking the motor.
When I got my 3WA the motor ran very slowly so I removed it and stripped it down so I could clean and lubricate as required. While the motor was out of the way I took the opportunity to clean the rest of the wallbox, I think I had to do the same with a 3w1 that was gummed up with grease, but I have never had that problem with the motor on a SC.
Regarding what is sometimes referred to as graffiti & by some as art ! I am afraid that I am of an age that were tought that it was vandalism & a criminal offence to maliciously cause wilful damage or destruction of some one else’s property, quite a few of my teachers had served in the forces during the Second World War & believed that most forms of corporal punishment were way to lenient for the little so and so who had started defacing school property .
I agree with you about it I don’t like to see it on anything whether it’s mine or not.
Interesting to see in the video that free play on the 3wa was achieved by grounding a grey wire near the motor.
Cheers Scudie
ParticipantNot sure why but some of my previous post has not been displayed.
I can only assume that the damage occurred either when the unit was shipped.
Or by someone pressing several of the central number buttons simultaneously very hard repeatedly, may be even hammering them with the hand untill the two riveted pieces gave way allowing the rear section to bow out of shape. Who knows it may have been the same low life that started to sign there name on the glass.
I have not seen this kind of damage before, but this SC was also very dirty inside as though it had been stored for some considerable time with no cover on it.
Cheers Scudie
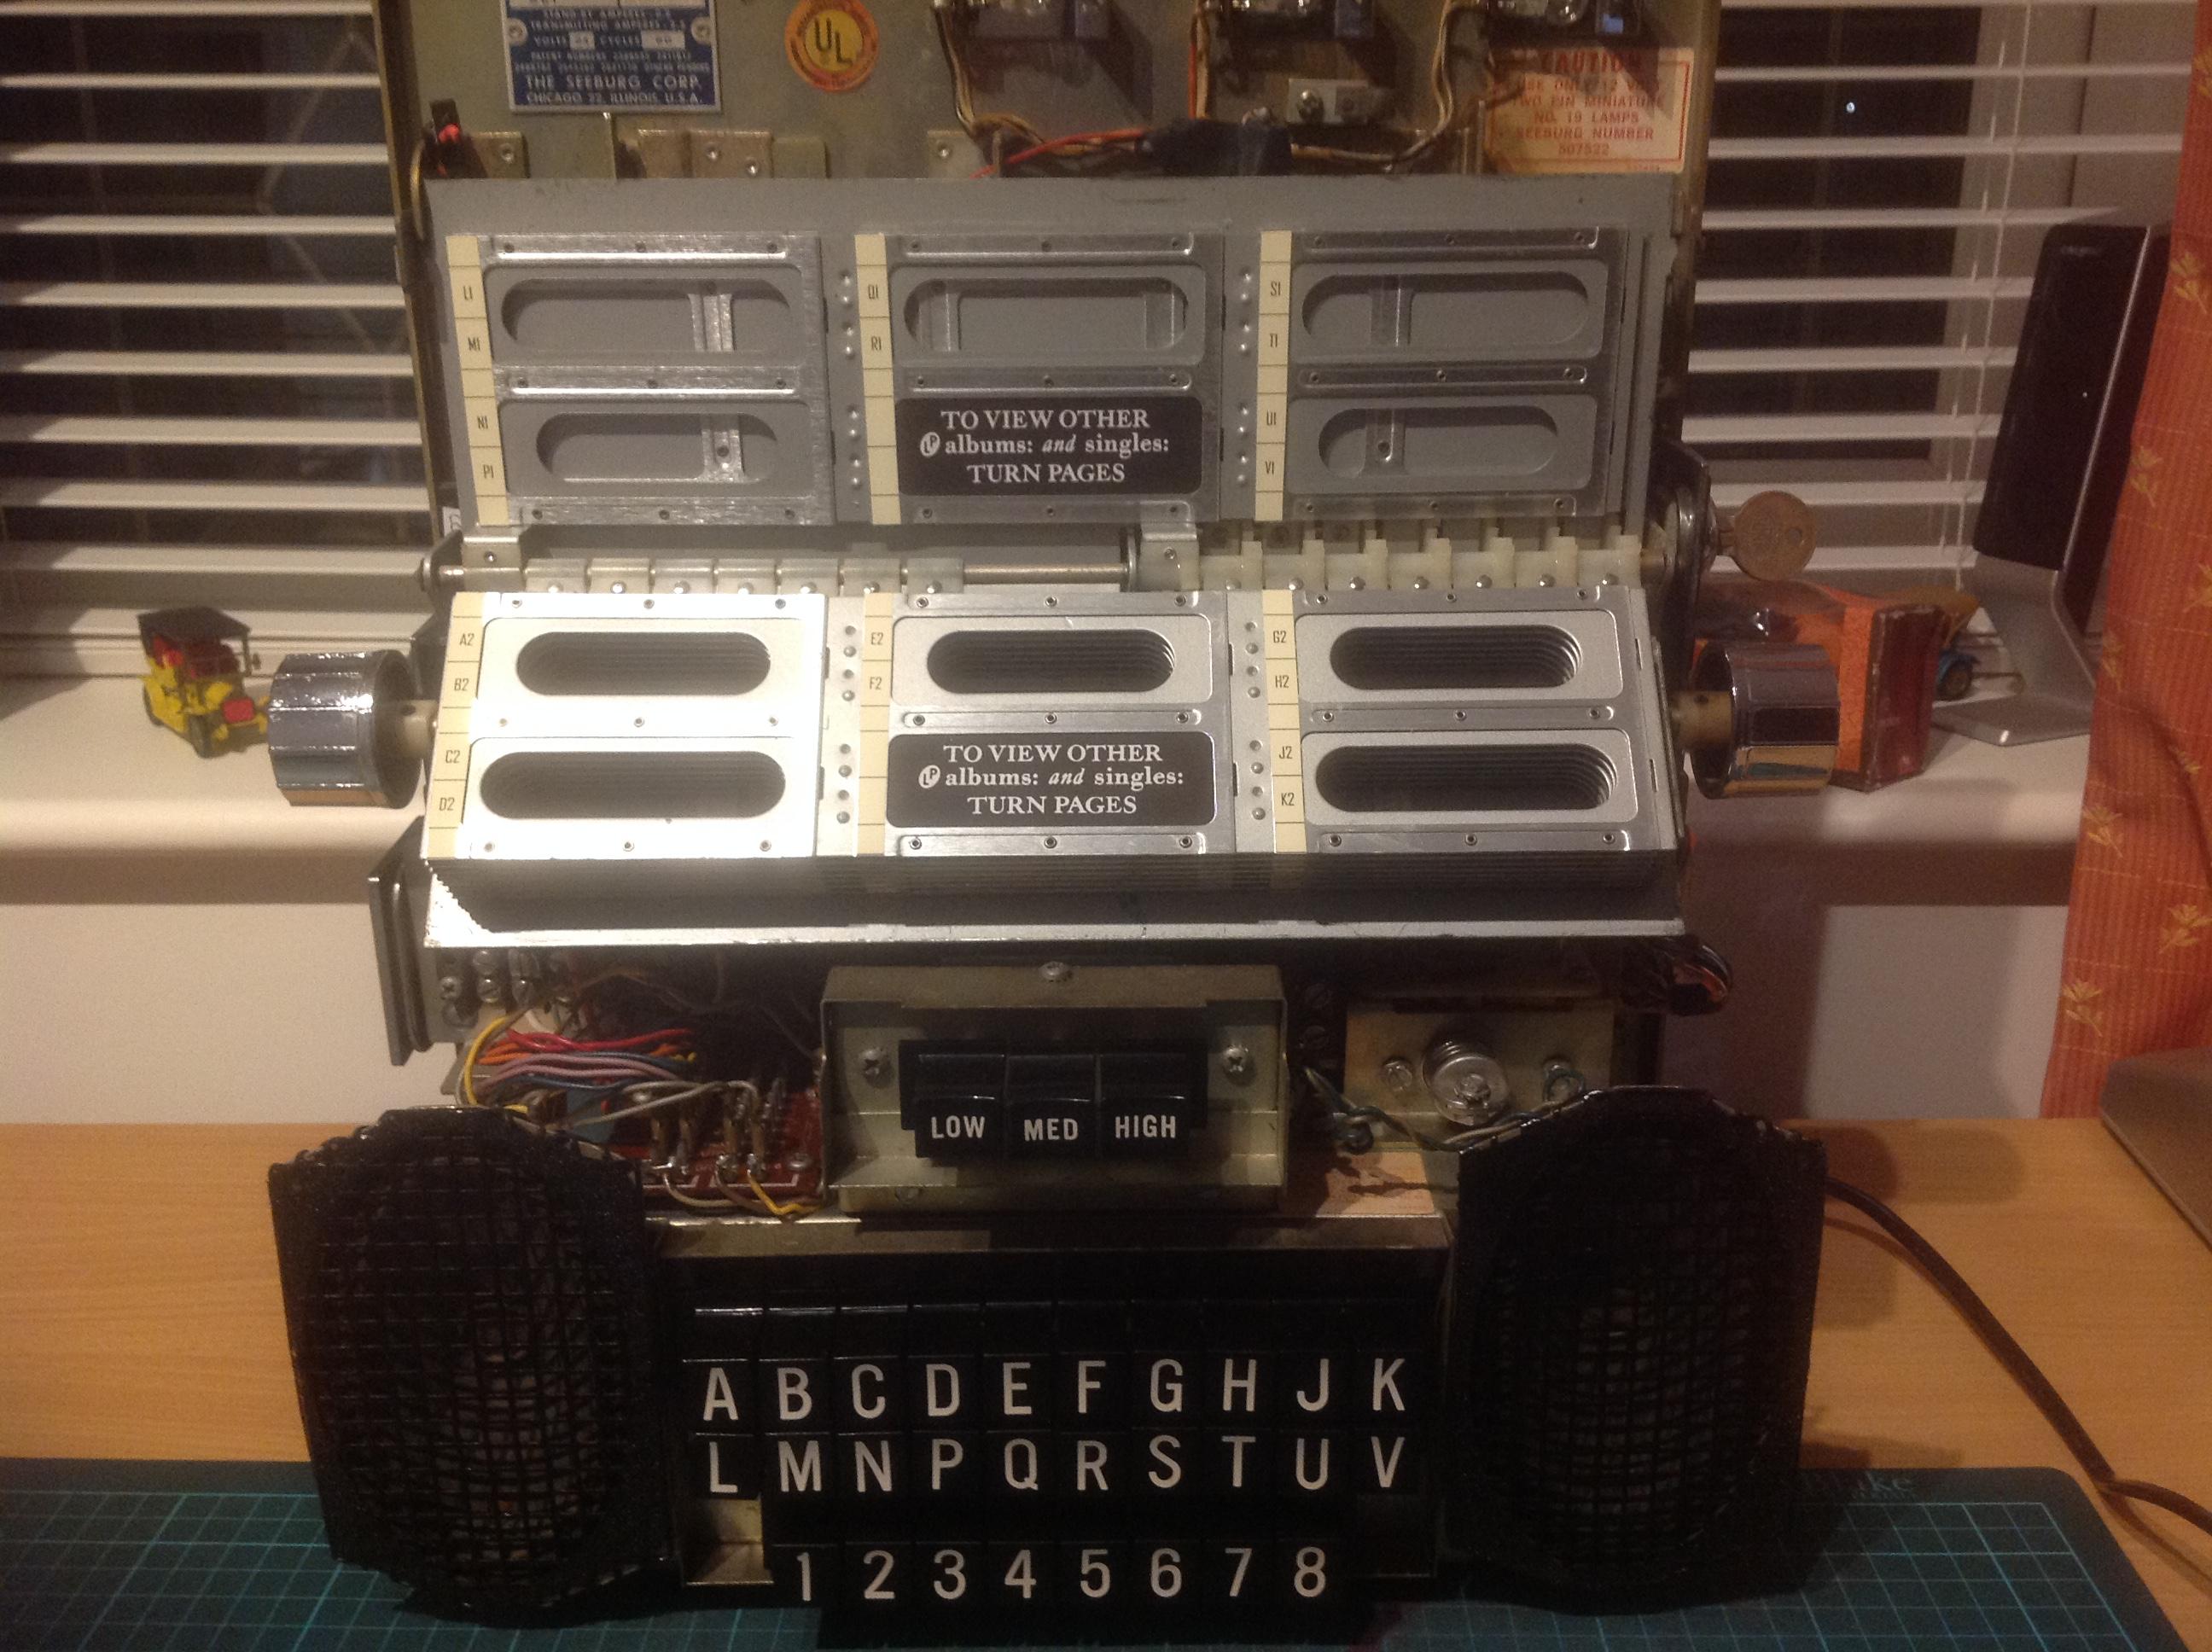
ParticipantAfter struggling for a while with my first SC (with unreliable signal pulses) I admitted defeat and stripped it and cleaned all the letter & number contacts.
Some times the buttons can be a pain to remove but they came off fairly easy on this one, the only awkward part of stripping the unit is unsoldering the two wires on the top motor starting switch because access is not great.
But I find that it’s the only way to be able to give the selection switch contacts a thorough scrub in hot water and detergent. After rinsing and drying I leave it overnight in the warm before starting to reassemble.
Cheers Scudie
ParticipantHi Randy
Dont know if it’s tempered or not, I know the side glasses just crack when damaged am guessing if temped they would shatter into little bits ?
I think I will give it a rub with some abrasive paper as the scratches can be felt with my finger nail so are fairly deep. Once I can’t feel them I’ll go to a finer and finer grade till I get to 1200 or 1500 then I will try polishing it.
Probably be a day or two befor I get around to doing it as I stripped the SC today as the only number buttons I could press was 1 & 8 the number switch bank was that distorted that the other six actuating plates totally missed the holes that the should pass through.
-
This reply was modified 3 years, 5 months ago by
-
This reply was modified 3 years, 5 months ago by
-
AuthorPosts